Showing posts with label recipes. Show all posts

Tuesday, July 31, 2012

Basil marinated peppers

 I came up with this recipe last year, when I had wayyyy too many peppers.  This year, I have wayyyy too many tiny peppers, and this was a great way to do something with them.


First, you need peppers.  Stop saying "Duh".   You can actually do this recipe with onions, too.  I like Bell Peppers for this recipe, but you can use hot ones if you like.

Then you'll need:
4 Cups Cider Vinegar or Red Wine Vinegar (5% acidity)
2 Cups Water
1/2 Cup Sugar
1/4 Cup Pickling/Canning Salt
8-10 Sprigs Fresh Basil, about 6" long, or a great big handful of leaves.
6 Sprigs Fresh Oregano

Wash peppers.

Wash the basil and oregano.  I use Amethyst Basil for this recipe. It's one of my favorite basils and the color is beautiful.

Mix vinegar, water, sugar, salt in large stainless steel pot.  Bring to boil.  Strip leaves from basil and oregano and add to mixture.  Boil gently for 10 minutes.  Sorry, forgot to take a pic of that one.

While mixture is boiling, cut peppers into strips.  You'll need about 12 cups of pepper strips, but you can make do with less.


After mixture has boiled for 10 minutes, remove from heat and add pepper strips.  Cover and let cool to room temperature, stirring occasionally.

When mixture has cooled, stuff peppers into clean, large mouth, quart jars.  Pour liquid over peppers, leaving 1/2 inch headspace.  Apply lids.  Refrigerate.  Use within three months.


This batch made three quarts.  If you end up with leftover liquid, it makes a great base for salad dressing: just add some olive oil!

We use these peppers on everything: burgers, subs, greek pizza, or just by the fork full!

Monday, October 24, 2011

Slow Food


A friend of mine asked, after my A Day In The Life post, how many meals I cook per day, and when I find time. I told her she probably didn't really want to know; around here, if you ask for fried chicken, someone will hand you a hatchet.

I thought it may make an interesting post, though.  She's not the first one to ask about how we eat.

We don't grow absolutely everything we eat.  I like Pop-Tarts, and I can't seem to find seeds for a Pop-Tart bush...or is that a root crop?  We do grow as much of our own food as possible, but we also try to enjoy life, and if we want the occasional take out pizza or frozen egg roll, I'm ok with that.

I used to post on a "What's for dinner?" thread on a homesteading forum.   Some people took offense when others listed things as homegrown, home canned, fresh picked, etc.  They said it sounded "uppity" and a bit like bragging, or some such nonsense.  I say if you plant it, grow eat, harvest it, raise it, pluck it, hunt it, gut it, or even just barter for it or buy it locally, then BRAG AWAY!! If you only tossed ingredients into a bread machine, it still deserves kudos, so give yourself a pat on the back.  Take pride in what you do, and don't worry about those jealous ninnies that can't do anything without a microwave and a can opener.

Anyway, I've listed our meals for the week.  My "uppity" details of how the food was harvested, etc, are for informational purposes only.  I certainly would never brag. **clears throat** I GREW THAT!! I CLEANED IT!! I COOKED IT!! WOOT!! GO ME!! I'M AWESOME!!  (oh dear, was that out loud?) *snickers*

This will also give you an idea of the way I cook.  I rarely measure things; I toss things into a pot and hope for the best, generally making stuff up as I go.  If I screw it up, the chickens happily recycle my mess into edible eggs.

Lunch is normally our big meal of the day.  We aren't breakfast people, thank goodness.  Sometimes, when it's just us girls here at dinner, we eat leftovers from lunch,  have sandwiches, or just snack on popcorn.


Sunday:
Brunch:  Homemade cinnamon rolls.

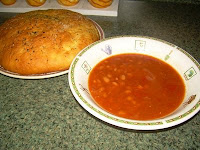
Dinner: Veggie soup and homemade rolls.  I haven't harvested the carrots and potatoes yet, so I had to go out and dig some up for the soup.  I picked some loveage, thyme and basil while I was outside.  It took a bit of scrubbing, but the root veggies were finally ready for the pot, along with some homegrown onions that had been stored in the fridge.  I added a quart of home canned tomatoes, some water, salt, and a couple of handfuls of brown rice.

Dessert:  Pear Crisp Pie.  Sort of like Apple Crumb Pie, but made with pears I picked right off our own tree. Finally.  The poor tree didn't have any last year, and only three the year before that.


Monday:
Lunch:  Leftover soup and rolls.
Dinner: Burritoes.  I was making Tuesday's Mexican Lasagna, so there was a bit of meat/pepper mix leftover.   I wanted something quick for Tuesday, so I made the Mexican Lasagna and put it in the fridge; all I had to do on Tuesday was bake it.

Tuesday:
Mexican lasagna:  Ground beef from my friend's farm, onions, fresh picked cilantro and peppers, a quart of home canned, chili-seasoned crushed tomatoes.  I cooked the beef, then stirred together with the rest of the ingredients, then layered with corn tortillas and cheese. Bake at 350 for about an hour.  This was lunch and dinner.

Wednesday:
Lunch:  Leftover mex lasagna again.  No one complains about leftovers around here, in case you were wondering.  I'm not a food nazi; if someone doesn't like what I cook, there's plenty of peanut butter for sandwiches.

Dinner:  Greek pizza tortillas.  Garlic crushed in olive oil, brushed on flour tortillas.  Tortillas are topped with basil vinegar peppers (yes, I made them), calamata olives, and onion, baked until crispy, and then topped with feta cheese.

Thursday:  Texas Italian:  Chorizo sausage, browned, then put in the crockpot with onions and lots of fresh picked green peppers.  Added one quart of home canned crushed tomatoes, plus two pints of home canned italian crushed tomatoes.  Served over Texas toast, made from leftover homemade bread, sliced into thick slabs, coated with a mixture of olive oil, butter, and fresh crushed garlic, then broiled.  Eöl calls this dish "spaghetti western".  (lunch and dinner)

Friday:
Lunch:  Leftover sauce from Thursday served over spaghetti noodles.
Dinner: Potluck.  Which means: raid the fridge for whatever you want.

Saturday:
Cheeseburgers, made from ground beef from my friend's farm. Topped with homegrown veggies and served on homemade buns.  Side dish: onion rings...from Aldi. lol   We were so stuffed from the late lunch that we really didn't eat much else that day.

Sunday:
I had a chicken soaking in salt water in the fridge overnight.  This was our old mean roo, and I knew he'd be pretty tough, so I put him in a pot for stew.  After cooking for a few hours, he was still a tough old bird.  So...into the crockpot (slow cooker).  We ended up having him for lunch on Monday.  Anyway, for Sunday, it was sandwiches.  We were working outside so I really didn't want to waste a lot of time in the kitchen.

Monday:
Lunch:  The old red roo, now tender as can be from cooking overnight in the crockpot, baked squash and greenbeans (both from the garden).

Dinner:  Leftovers.

Tuesday:
Lunch: Chicken Stew.  I fished all the bones out of the crockpot, and added some veggies, and cooked overnight.  There was still some stew leftover, so that went into the freezer to be made into pot pies.

You may read through this and think, "Well, she doesn't even cook every day!"  And you'd be right! When you  cook slow food, it really is slow. S. L. O. W.  Who has time for that every single day?  But we still want to eat something healthy, tasty, and filling every single day... preferably without my being stuck in the kitchen when the weather is nice.  What's a gal to do?  I cook big portions, and find ways to reuse those leftovers in meals the rest of the week.

There are days that I make a huge pot of something, counting on leftovers, only to have every bit eaten that first meal.  Well, I'm sure not going to complain about that!! Either it means we were very hungry, or it means I'm a pretty good cook.  Probably we were just starved. lol

One thing about homegrown food:  it's more filling.  We could eat an entire bucket of KFC in one sitting, but a single home grown chicken can make several meals.  I'm not sure why that is.  It could be that the home raised chicken had access to grass and feed every day, plenty of sunshine, fresh air, and clean water.  Basically, there's just more to the meat that way, if you know what I mean.  Compare that to chickens raised in overcrowded cages, indoors, the air full of the reek of chicken manure (boy, I can tell ya, that stuff STINKS!!), fluorescent lighting instead of sunshine...you get the idea.

I have several older hens in the freezer.  Anyone have any good chicken recipes for a slow cooker?

Saturday, February 13, 2010

What is it? And what do I do with it?


It's Pink Banana Squash!! Or, as my dear friend convinced her offspring: winter pumpkins. Yes, I've mentioned them here before, as I grew a slew of them this past season. And yes, we still have plenty. They store exceptionally well. I still have two full baskets of them stored in a cool, dry place.


Now that you know what they are, what do you do with them? Don't worry, it's not complicated and doesn't involve any sort of sacrifice, animal or human.

Wash your squash. Then cut open lengthwise. Scrape out seeds (an ice cream scoop works great). Place cut side down on baking pan. Bake at 350 until a fork pokes easily through the outer skin (time varies from 30 minutes to an hour or more, depending on the size of your squash). Remove from oven and let cool. Scrape cooked squash from skin using a large spoon or ice cream scoop. Or, remove from oven and serve with butter, brown sugar, a sprinkle of cinnamon, etc.

You can use this squash in any recipe calling for pumpkin. Substitute two cups of squash for one can of pumpkin. Whatever you don't use right away can be frozen. If you freeze it in two cup measurements, that makes things easier for next time. Easy as pie! And, speaking of pie, here's my favorite recipe for pumpkin...er...Pink Banana Squash Pie:


2 cups Pink Banana Squash (baked)
2 eggs
1 cup sugar
1/2 tsp salt
1/2 tsp ginger
1/2 tsp nutmeg
2 tsp cinnamon
dash of ground cloves
1 can (12 oz) evaporated milk
Mix well and pour into pie shell. Bake at 425 for 15 minutes, then reduce heat to 350 and bake 45 minutes or until knife inserted in center comes out clean.


More pumpkin/squash recipes can be found here. (Hat Tip to Dearest Friend for the link.) Keep in mind that the nutritional information posted for each recipe will be different if you are using your very own fresh produce instead of the canned moosh listed in their ingredients.

Friday, February 12, 2010

Tomato soup recipe


I've had a request for my tomato soup recipe, so here 'tis:
I start with this recipe from Ball, which they call Basil-Garlic Tomato Sauce:


Basil-Garlic Tomato Sauce
Makes about 7 (16 oz) pints

20 lb tomatoes (about 60 medium)
1 cup chopped onion (about 1 large)
8 cloves garlic, minced


1 Tbsp olive oil


1/4 cup finely minced, fresh basil


Bottled lemon juice


7 (16 oz) pint glass preserving jars with lids and bands


Directions:

1.) PREPARE boiling water canner. Heat jars and lids in simmering water until ready for use. Do not boil. Set bands aside.
2.) WASH tomatoes; drain. Remove core and blossom ends. Cut into quarters. Set aside.
3.) SAUTE onion and garlic in olive oil until transparent. Add tomatoes. Bring to a boil. Reduce heat and simmer 20 minutes, stirring occasionally.
4.) PUREE tomato mixture in a food processor or blender, working in batches. Strain puree to remove seeds and peel.
5.) COMBINE tomato puree and basil in large saucepot. Bring to a boil. Reduce heat and simmer until volume is reduced by half, stirring to prevent sticking.
6.) ADD 1 Tbsp bottled lemon juice to each hot jar. Ladle hot sauce into hot jars leaving 1/2 inch headspace. Remove air bubbles. Wipe rim. Center hot lid on jar. Apply band and adjust until fit is fingertip tight.
7.) PROCESS filled jars in a boiling water canner for 35 minutes, adjusting for altitude. Remove jars and cool. Check for seal after 24 hours. Lids should not flex up and down when center is pressed.


After I made this sauce the first time, I thought it tasted exactly like Campbell's tomato soup, so that's pretty much how we've used it since. The recipe makes sort of a concentrate, so here's how I prepare it:


One jar of Basil-Garlic Tomato Sauce
Two jars water
1/2 tsp onion powder (more or less to taste)
1/2 tsp salt (more or less to taste)
1 Tbs Sugar (optional)


The soup is fairly thin, so you can thicken it with a couple of tablespoons of flour or cornstarch if you wish.

Bring to boil. Reduce heat and simmer for at least five minutes.

It is surprisingly filling. Excellent when served with grilled cheese or fresh, homemade bread sticks.


Thursday, February 11, 2010

Speaking of Writer's Butt

These aren't helping!! **Must stop eating Kifli**

Hungarian Cream Cheese Kifli

(from Cookies to Die For by Bev Shaffer)

  • 1/2 lb unsalted butter, cut into pieces, room temperature
  • 1/2 lb cream cheese, cut into pieces, room temperature
  • 1/2 Tbs baking powder
  • 3 large egg yolks, reserving egg whites for brushing cookies
  • 2 1/2 cups unbleached, all purpose flour
  • Confectioners' sugar for dusting cookies
  • Any flavor jam for filling

Cream together butter and cream cheese until light and fluffy.

Mix the baking powder into egg yolks, whisking to blend. Add to the butter mixture, blending well.

Add the flour gradually until all is incorporated and dough comes away from bowl.

Divide dough in eighths and shape each into a disk. Wrap in plastic wrap; flatten to 1/2". Chill dough overnight.

Heat oven to 350 degrees. Line cookie sheets with parchment paper.

Roll dough on lightly floured board, turning and flipping as you roll, until very thin, a min. of 1/16". Cut 2" squares (or any desired shape). Fill with 1/2 tsp to 3/4 tsp of desired filling and fold 2 of the opposite corners together. Pinch lightly to seal. Brush with reserved egg whites.

Bake until a light golden brown, about 20 minutes. Cool 1 minute, then remove from cookie sheets to wire racks to cool completely.

Sprinkle cookies with confectioners' sugar when cool. Makes about 6 dozen.

Saturday, January 9, 2010

O M Geeee!

If you've never had homemade noodles, you just don't know what you are missing! I made my very first batch today, threw them into some homemade lasagna (all ingredients except the flour and dairy were from our very own farm), and Oooooo My!! We will never eat store noodles again!!

I looked through several noodle recipes, and finally settled on this one from Better Homes and Gardens New Cook Book (well, it was new back in '85):

1 beaten egg
2 Tbs milk
1/2 tsp salt
1 cup all purpose flour

Combine in mixing bowl. Knead well. Cover and let rest for 10 minutes. On a floured surface roll dough out to desired thickness. Roll up loosely and cut into slices.

The directions said to hang the noodles to dry, but I skipped drying the noodles and boiled them in salted water for about three minutes.

I quadrupled the recipe but I think double would've been sufficient. We ended up with a HUGE batch of lasagna.

I go now to collapse in the floor and digest.

Saturday, November 21, 2009

World's Best Sweet Potato Casserole!!

3 cups mashed sweet potatoes
1 cup white sugar
2 eggs
1 Tablespoon vanilla
1/2 cup butter
1/3 cup milk

Mix all of the above ingredients well. Spoon into buttered baking dish (9x9).

In a separate bowl, mix topping:

1 cup brown sugar
1/3 cup flour
1/3 cup butter

Stir in:
1 cup chopped pecans

Sprinkle over sweet potato mixture. Bake at 350 for 30 minutes.

Wednesday, November 11, 2009

Monkey Bread


I have no idea why this stuff is called Monkey Bread. Do Monkeys like it? Eat it? Fling it?

Anyway....

The basic recipe for the dough can be found here. I use that bread dough recipe for just about anything baked and yummy. lol

I made a loaf of bread, and since I only needed one, used the leftover dough to make this Pull Apart Monkey Bread.

Use one half of the bread dough recipe, unless you want a LOT of Monkey Bread. Let the dough rise once, then shape into small balls, dip in melted butter, and roll in a mix of cinnamon and sugar (the size pictured used 1/4 cup melted butter, 1/2 cup sugar, 1 tsp cinnamon). Place dough balls in greased bunt or angel food cake pan (or any pan, for that matter). Drizzle any leftover butter/cinnamon/sugar over balls. Let rise. Bake at 350 for about 30 minutes.

Watch out for monkeys!

Sunday, March 8, 2009

Easy as bean soup

This soup is a favorite in my house. It's a bit like the Campbell's bean with bacon soup. I use a one gallon crock pot, start the soup before bed, and it's ready by lunchtime the following day. I don't soak or boil the beans, just rinse and add them to the pot.

NOTE: Do NOT try this with kidney beans!! Please read here about kidney beans.

Ingredients:
  • Canned tomatoes (I use one quart of home canned tomatoes)
  • 2-4 cups of dried NORTHERN and/or PINTO beans (use the lesser amount if you prefer your soup extra soupy, the greater amount if you prefer it beany; we prefer beany)
  • 1 tablespoon vinegar
  • Salt, onion powder, garlic powder, chili powder, red pepper flakes (these are all to taste, but I recommend at least one Tbs of chili powder to start with.)
Directions:
  • Rinse beans
  • Add all ingredients to crock pot
  • Add water till crock pot is full
  • Cover, cook on HIGH at least 12 hours or until beans are very tender (this is what it takes in my crock pot, but if you have a newer one it may work faster)
  • I usually add more water to this after several hours as the beans soak it up.


I always make a fresh batch of homemade bread to go with the soup. Recipe is here. To make the herb bread pictured here, just mix 1/4 cup olive oil with the herbs of your choice. I used about a tsp of rosemary and a tsp of basil, plus a dash of onion powder. When you have the bread dough ready for the second rising, just brush this on and sprinkle with a dash of kosher salt. Let rise and bake.

This is a very frugal meal. I can't remember exactly how much I paid for the dried beans. It was $1.29 or $1.79, so I'll round it to $2.00 for all of the soup ingredients. It would cost a bit more if I had to buy canned tomatoes, but the point of growing our own is to save money and have better quality. I know I could do this even cheaper if I grew and dried the beans, but we are all HUGE green bean fans, so none of the beans we grow last long enough to be dried.

With a one gallon pot, you get 16 8oz servings of soup. That's about 13 cents per serving. The bread costs about 89 cents for two loaves (one batch of dough). Two loaves easily divide into 16 servings, which brings the total cost of soup and bread to about 19 cents per serving.

A meal for less than 20 cents per serving? Frugal!! Woot!

Before you even ask, I don't add in the cost of electricity to cook the meal. No matter what we eat, I'd most likely have to cook it, so it's the ingredients that really add up. I do plan to try making this on the wood stove in a cast iron pot, but not as an overnight thing.

Thursday, August 28, 2008

I admit it:


I kind of enjoy the look of envy I get from people when they find out we mostly eat homemade bread (and not from a bread machine). That's why I've put off the bread post. Selfish, I know.


Store bread makes me gag, and forget about store buns for burgers because those are just nasty. (Yes, I do have rush days that I pretend the squishy stuff from a bag is real bread, sadly.) Fortunately, it's not as difficult as people would have you think.
Homemade burger buns

Remember those commercials for rice crispy treats? The mom is sitting in the kitchen reading, the kids keep yelling from the other room to ask if they are done yet. Finally, the mom splatters herself with flour, musses up her hair, and carries the tray of treats into the other room, doing her best to look as though she has worked long and hard on treats that took no time to make. Well, my bread is a lot like that.

The dough can be used for anything: cinnamon rolls, pretzels, pizza dough, doughnuts, bread sticks, etc.
Before I give you the recipe, here are a few tips:

*I mix the dough in a big bowl, knead it there, and then spread oil in the same bowl for the dough to rise. That way, I don't have a mess on the counter.

*I buy my yeast in bulk. You can get it at Sam's Club, GFS, or even some health food stores. I get mine at GFS, about $2 a pound, which is a much better deal than packets.

*This dough gets really big, so I don't even bother to cover the bowl. If I do have to cover the dough, I use greased plastic wrap.

*I use only unbleached flour.

Ok, *deep breath*, here goes:
2 cups lukewarm water
3 Tbs sugar
3 Tbs yeast
Mix those together in a big bowl. Then add:
2 cups flour
1/3 cup vegetable oil
1 Tbs kosher salt
Mix well, then add additional flour, a little at a time, until you have a dough about the consistency of playdough.  This can be up to four cups, but it usually doesn't take that much. 

Knead, adding sprinkles of flour if dough is still very sticky.  Try not to get dough too heavy; the less flour, the fluffier the bread.

Grease the bowl and let rise till double (or bigger). The time will vary depending on heat and humidity.
For bread: Grease loaf pans, divide dough in half, reshape and let rise. I usually let mine rise till it fills up the loaf pan. It will continue to rise while baking, so make sure you leave room between the oven racks and burners or you'll have a big mess.

If you don't have a loaf pan, you can make "Hawaiian" type loaves: separate dough in half and shape into balls, place on greased baking sheet.

Bake at 375 for about 20-30 minutes. The baking time will vary depending on the size of the loaf pan (I have at least three sizes myself). The bigger loaves can take about 40 minutes. For best results, once the top has browned and the loaf is firm enough (after about 20 minutes), slide the loaf out of the pan and bake for another ten minutes, or until done.  Loaf should sound hollow when tapped on the bottom.
Garlic-Parmesan Bread Sticks
For bread sticks, press dough onto greased pan, brush with olive oil, sprinkle with garlic salt and Parmesan cheese, bake at 350 till browned on the bottom and top, and then brush with melted butter. You can also make them with cinnamon and sugar instead of garlic and cheese.

*Note:  Homemade bread is of course free of the tons of extra preservatives that store bread has. Therefore, it won't keep as long.  Store leftovers in the fridge or freezer.  An extra loaf is great to freeze and then slice up later for Texas Toast.  Just coat with butter or olive oil and garlic and broil til lightly browned.  

Let me know how yours turns out!!

Monday, February 18, 2008

Brownie Recipe

If you like brownies and have a hard time finding those just right, soft in the middle, crunchy on top, super rich brownies…I have the recipe for you! These are the BEST brownies I’ve ever had!

12 oz semi-sweet chocolate chips
4 T butter
1 C flour (plain)
1 tsp baking powder
2 eggs
2 tsp vanilla
2 C sugar
1 (8 oz) pkg of cream cheese


Melt chocolate chips and butter together. I do this in the microwave. Stir well. Stir cream cheese into warm, melted chocolate chips until well blended. Add this mixture to a big bowl with the rest of the ingredients. Mix well. Pour into greased 13 x 9 inch pan. Bake at 350 for 45 minutes.